Puppies have soft, fluffy coats that make you want to cuddle them all day. Now that you’re a proud dog owner, it’s important to look after your puppy’s fur with regular brushing…
So, how often should you brush your puppy?
You should brush your puppy every day for the first few weeks to make him/her comfortable with being brushed. Once your puppy is happy to be brushed, start brushing your puppy as often as he/she will be brushed as an adult dog. This gets your puppy used to its adult brushing routine, which can be every few days but must be at least once a week.
Brushing your puppy is an important part of grooming and care, but brushing too little or too much can hurt your puppy or damage the delicate fur. If brushing is done the wrong way, your puppy might end up hating being brushed and fight with you or the groomer every time the brush comes out.
When deciding how often to brush your puppy, it’s important to understand your dog’s body language and know how often your puppy will have to be brushed as an adult dog.
For the first few weeks, brush your puppy daily. Do this until your puppy is calm and happy to be brushed. A calm and happy puppy:
Breathes normally, not too fast
Has relaxed ears, not ears pointing backwards
Sits relatively still (puppies cannot be expected to sit still for very long because they have a strong drive to move around and explore the world)
Is playful but not aggressive
Even shakes their bum and tail in excitement when seeing the brush
Once your puppy is comfortable and relaxed during brushing, you can start getting your puppy used to the timing between brushes and the grooming sessions that he/she will have as an adult dog.
For example, say you have a puppy that’s a dog breed with a long, smooth coat. You can use the table below to see that you need to brush a long-coated adult dog every 2 to 3 days for the best results. Once your puppy enjoys being brushed daily, start brushing your puppy every 2 to 3 days so your puppy can get used to this regular brushing routine for adulthood.
How often you will brush your puppy as an adult dog depends on two things:
the length of your dog’s hair, and
the type of coat your dog has
The following table shows how often you should brush your dog depending on your dog’s hair length and coat:
Type of adult coat
Examples of breeds with this hair length and coat
Traits of this adult coat type
How often you should brush your puppy
Hairless dog (hairless dog breed or hairless from a skin condition)
You can brush a puppy as often as you like, as long as you don’t push too hard and you use the right brush. If you see your puppy’s skin becoming red, dry or patchy, then you are probably brushing too often, brushing incorrectly, or using a brush that’s too rough for your puppy’s skin.
How soon should you start brushing a puppy?
Puppies don’t naturally love being brushed – they need to be introduced to brushing and learn to enjoy it when they are still young and open to learning new things.
The best time to start brushing a puppy is the day you bring the puppy home. A puppy can be brushed from the age of 8 weeks. Puppies learn most of their ‘life skills’ between 2 and 6 months of age, so this is a good time to help your puppy learn that being brushed is fun.
If your puppy has a positive introduction to brushing and learns to enjoy it, grooming and brushing will be a lot easier for the rest of your dog’s life.
A puppy’s fur coat changes as the puppy gets older. Over time, this puppy fur is replaced by the dog’s adult fur. The new coat might grow longer, thicker, become shinier, change color, or become coarser and less soft.
All puppies have one coat of fur, called a single coat. But adult dogs can have a single coat or a double coat.
Double-coated dogs have two layers of fur. The first coat, closest to the skin, is short and woolly. This undercoat helps keep the dog’s body temperature stable. The second coat, the top coat, sits on top of the undercoat. The top coat hair is longer, and it’s there to stop dirt and water from getting through to the dog’s undercoat and body.
Every dog sheds its puppy coat and grows an adult coat. Most puppies lose their puppy coat when they are about 6 months old, but a puppy can grow an adult coat anywhere between the ages of 3 and 24 months. Some breeds simply lose their puppy coats earlier than others because they mature quicker (which is also why some breeds need to move to adult dog food sooner).
Shedding is also affected by the time of year, the quality of food the dog eats, and how much sunshine the puppy gets.
Shedding is a big change for a young, growing dog to go through!
You might not see much of a difference in a maturing single-coated, short-haired puppy.
If you have a double-coated breed, your puppy might look scruffy or patchy in this shedding stage, called the ‘puppy uglies’.
If your dog is long-haired, you may need to do more brushing for longer to get out knots and remove puppy fur trapped in the adult coat.
How often should you brush your puppy to prevent shedding?
Brushing does not prevent or stop shedding in dogs, but brushing a puppy that’s shedding at least two to three times a week lessens the amount of hair the puppy leaves lying around. Brushing this often removes loose hair before it can fall off. Shedding is a natural and healthy process, and no amount of brushing will ever stop shedding altogether.
Shedding is a puppy’s way to lose old hair and replace it with new, healthy hair or an adult coat. It’s also how your dog will grow a warm coat for winter and a cooler coat for summer.
Puppies that spend a lot of time indoors, where the temperature stays fairly consistent, tend to shed less than outdoor dogs of the same breed. This is because indoor dogs don’t rely on their coats as much to control their body temperature – they rely on heaters to warm up, and air conditioners and fans to stay cool.
It is important to stick to regular brushes every 2 to 3 days when your puppy is shedding, whether your puppy is indoors or outdoors, to keep the loose hair under control and manageable.
How long should you brush your puppy?
Start brushing a puppy for a minute or two at a time every day, then slowly build up to longer brushes that last no more than 10 minutes. This is enough time to give the puppy’s coat a proper brush that removes knots and dirt. If your puppy is shedding, simply brush until there is no more loose hair showing on the dog brush.
Give your puppy lots of praise and treats during the brushing and after, whether the brush lasts 1 minute or 10 minutes.
What type of puppy brush should you use?
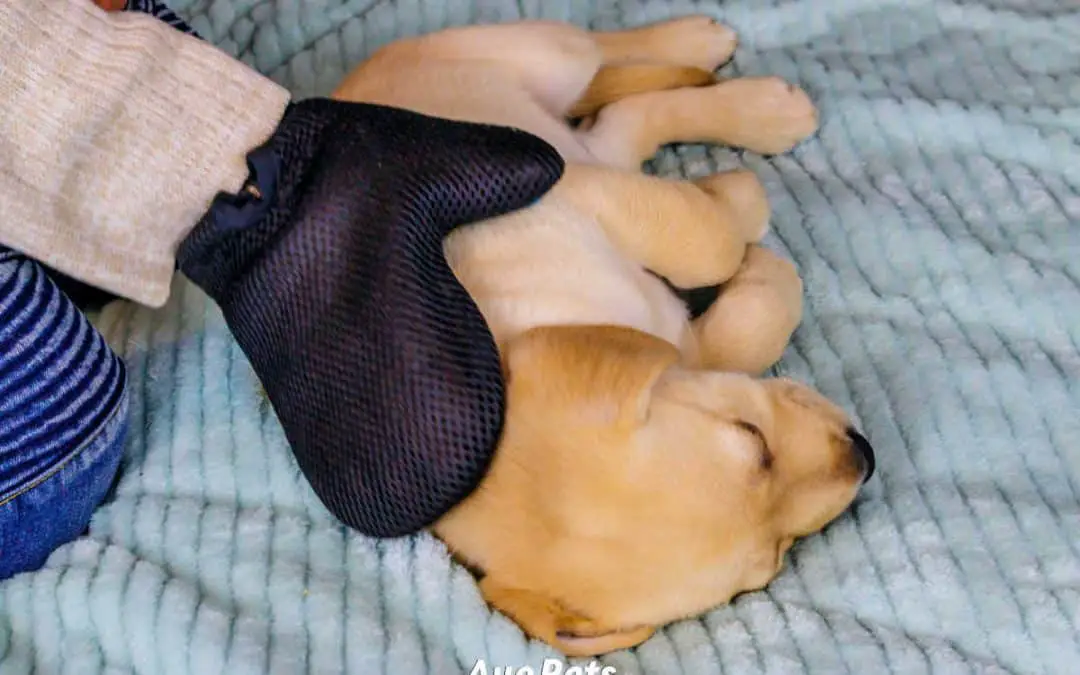
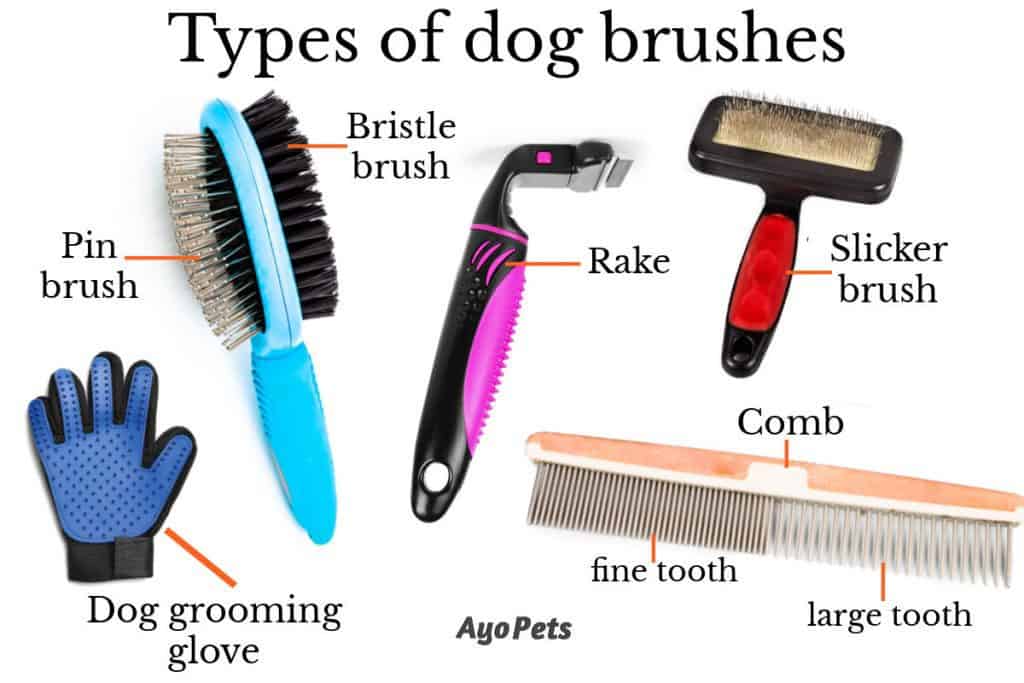
Start by brushing your puppy with a soft, rubber-bristled or rubber-tipped brush that massages the skin, removing dirt and knots at the same time. Never use metal, stiff-bristled brushes or stripper brushes on a puppy’s coat as all puppies have soft, sensitive skin and a single coat that does not need stripping.
Here are some great soft brushes for puppies with a puppy coat that you can get on Amazon (affiliate links):
Puppy brushes are good for general upkeep, such as massaging the skin, keeping the coat clean and removing loose hair. Dog combs are better for small jobs in one area of the coat, such as getting out knots and removing fleas.
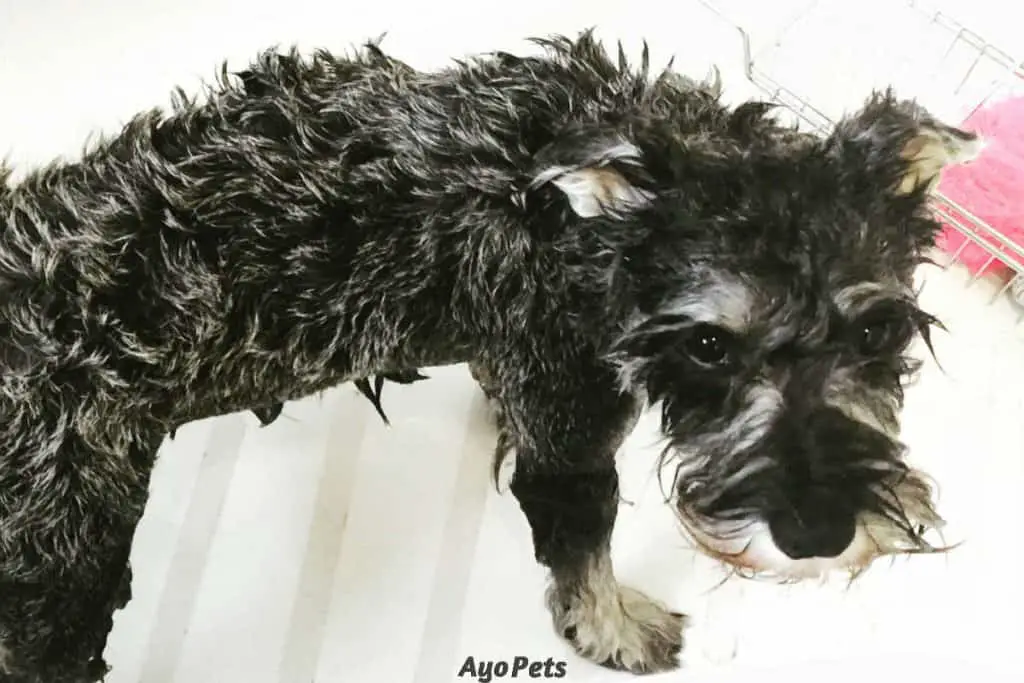
It’s best to brush a puppy with dry hair. Soap and water soften a dog’s hair and skin, making the wet hair looser and weaker than when it’s dry. Brushing a puppy with wet hair can break the hair, make knots harder to comb out, or even cause bald patches where the hair is pulled out unevenly.
Because soap and water soften the skin too, brushing a wet puppy with a rough brush or with too much pressure can hurt the puppy and break the skin into sores.
You don’t have to bath your puppy every time you brush him/her, but it’s important to brush your puppy before every bath. Doing so will remove loose hair and make washing your puppy easier.
Why you should brush your puppy regularly
Did you know that brushing your puppy has many benefits for both of you?
Brushing your puppy regularly with the right brush can:
· Get your puppy used to being brushed
It’s extremely important to get your puppy accustomed to being brushed and to even look forward to this important grooming time.
If your puppy never learns to enjoy being brushed, your puppy will be unhappy and probably run away to hide whenever you take out the brush. This could make grooming a struggle for the rest of your dog’s life.
· Remove knots and mats
Even though puppies have shorter hair than adult dogs, they can still get knots and things stuck in their fur. Regular brushing will keep knots under control, and make these knots less painful to brush out.
Very big knots and mats may need to be cut out rather than brushed or combed out, so you don’t hurt your puppy.
Brushing massages the puppy’s skin, removing dirt and debris from the skin and coat at the same time.
· Help your puppy grow its adult coat
All puppy hair goes through 3 phases: a growth phase, a rest phase, and a shed phase. During the final shed phase, the old hair leaves the hair follicle in the skin and falls off the puppy.
But sometimes this loose hair gets stuck in the puppy’s fur, especially if the puppy is growing a double coat or shedding a thick coat.
Brushing can remove a lot of loose hair from the coat to prevent matting.
· Help you pick up health issues early
When you brush your puppy, take some time to check your puppy’s skin and overall coat condition. Getting to know your puppy will help you pick up health issues, illnesses or growths, so you can get advice and treatment from a veterinarian if you need to.
Look for the following signs and symptoms:
Marks, sores, or scabs on the skin
Ticks, fleas or parasites in the fur
Dry or flaky areas of skin
Lumps and bumps
The color of the gums and any changes in color
Holes in or damaged teeth
Any major changes in the appearance and feel of your puppy’s skin and hair
· Be a time for bonding between you and your puppy
Brushing your puppy and spending time with him/her is a wonderful way to bond with your pet and make you both happier and healthier.
Studies have shown that contact with animals can make you happier, release stress, and help you fight infections.
When you touch your puppy, you release a hormone called ‘oxytocin’, which is a bonding hormone. This hormone helps you build an even stronger bond with your dog and a deeper love for each other.
If you don’t ever brush your puppy, your puppy won’t enjoy the many benefits that come with regular brushes (they’re all listed and explained above). In fact, some not-so-nice things might happen if you never give your puppy a brush.
Here’s what might happen if you never brush your puppy:
Your puppy will leave more hair around your home. All puppies shed, which means all puppies lose hair. Brushing helps to remove loose hairs in one go and keep them under control. Without brushing, a puppy will leave more hair lying around.
Dead skin and dirt may build up on your puppy’s skin, making your puppy smell bad and get health issues later on.
Your puppy’s hair may get very knotted and matted, which will have to be cut off.
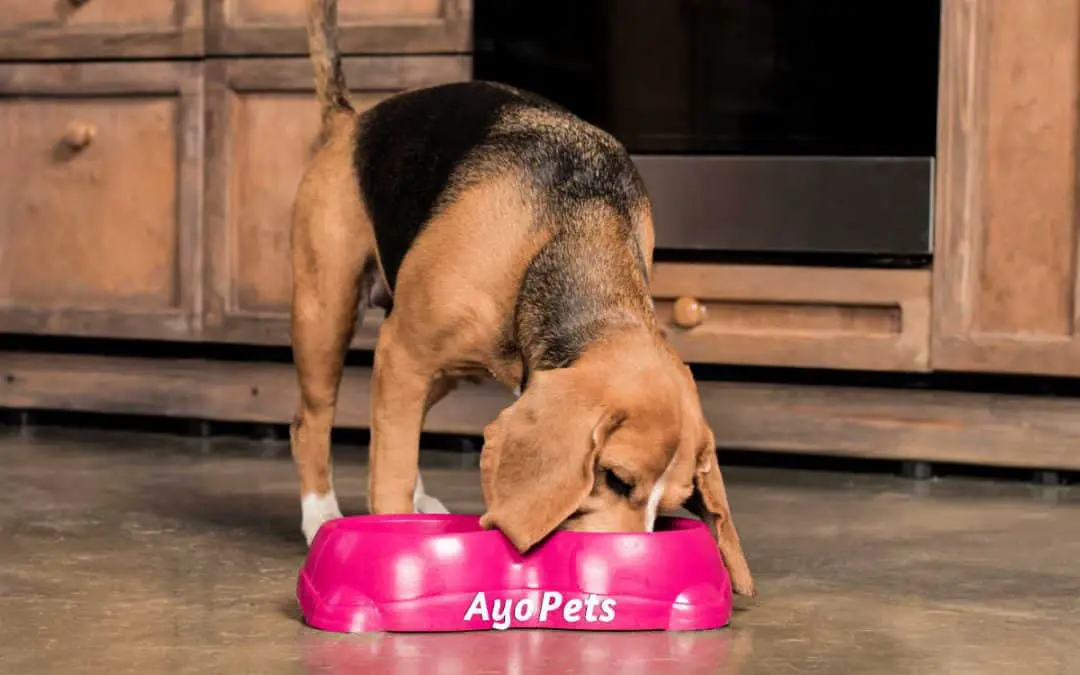
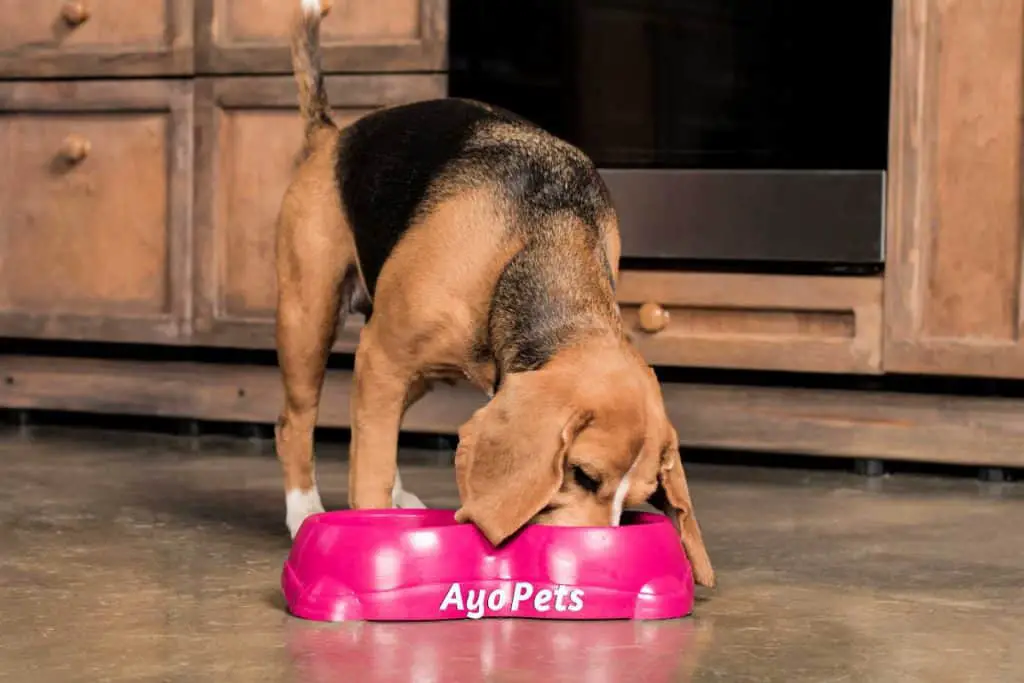
There are many types of dog bowls on the market but are the plastic bowls safe for your dog, who will be eating and drinking out of these bowls each day? Plastic bowls are very popular with dog owners so this is an important question to answer.
I did some digging to find out if plastic bowls are safe for dogs and it turns out that:
Bowls that are made from high-quality, food-grade plastic are considered safest for dogs. Low-quality plastic, wear and tear, allergies, and dogs that like to chew can make plastic bowls unsafe for a dog. Every type of bowl has drawbacks, so if your dog likes plastic buy the best quality you can afford and manage the risks of plastic bowls.
Plastic bowls are a popular choice with dog owners because they are inexpensive, lightweight, and long-lasting. But plastic often gets a lot of criticism in the media and from advocacy groups.
There are actually benefits and risks with each type of dog bowl and who shares the dog bowl and who shares the dog bowl . Knowing the risks associated with plastic bowls and what to look for will help you decide if you want to use plastic bowls and how to minimize these risks, to keep your pooch happy and healthy.
Let’s look at all the reasons why plastic dog bowls might not be considered ‘safe’ for dogs and what we can do to manage these risks.
Why plastic bowls may not be safe for dogs
Some groups claim that plastic releases chemicals
BPA is a chemical that is put into plastic to make it hard. BPA is found in a lot of things we use every day and, if tested, your doctor would probably find some BPA in your body right now.
Some doctors think that BPA gets into the body quickest and easiest through plastic containers for food and drink.
The problem is that experts and advocacy groups cannot seem to agree on what damage, if any, is caused by taking in BPA.
Some groups and researchers claim that BPA affects the liver, kidneys, brain, immune system, and other functions in the body. But these studies often make questionable and/or unverified claims when it comes to their findings on how bad BPA is.
‘BPA is safe at the very low levels that occur in some foods’ and that the ‘use of BPA in food packaging and containers is safe.’
Another 2-year government study found that authorized uses of BPA by the FDA is safe for consumers, with BPA not being much of a threat.
No studies have been done on the long-term effects of BPA on dogs, so there’s no definitive evidence on this one way or another. Also, there are stringent FDA quality control standards set for human food-grade plastic products but not for pet products, especially those made in other countries and imported.
There is a list of FDA-approved plastics that the FDA deems safe for contact with food and drinks for human consumption.
If you want to use plastic dog bowls, buy the best quality, food-grade plastic that you can find. Choose bowls that are:
1. Made in the USA
2. Not made from recycled material (recycling can change its safety for food and drink contact)
3. Made from a plastic that is approved by the FDA, such as Polycarbonate and PET
If your dog’s plastic food bowl ever gives off a strange smell, called off-gassing, changes shape in any way, or starts looking worn out, it’s time to get a new bowl.
Some dogs are allergic to plastic bowls
Some dogs are allergic to or become allergic to the plastic in a dog bowl. These dogs might be allergic to the type of plastic, or to one of the components used to make or dye the bowl.
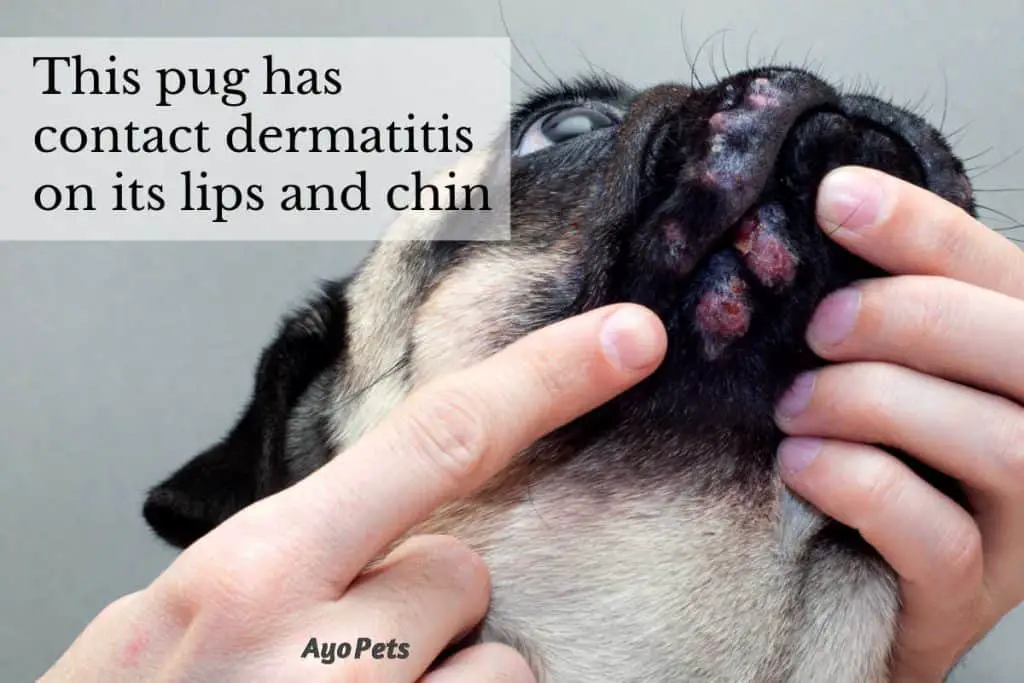
When a dog that is allergic to plastic comes into contact with a plastic dog bowl, the dog gets contact dermatitis.
Contact dermatitis simply means that the skin becomes irritated and inflamed wherever it touches the thing it’s allergic to.
This dermatitis could show up as red skin, small bumps, blisters, cracked skin, raised itchy areas, ulcers, or a rash on the parts of the dog that touch the plastic bowl.
The dog could get dermatitis on its nose, around the mouth, along the chin, and even on its paws if the dog touches the plastic with its feet.
Some plastics have a chemical in them called p-benzylhydroquinone. This chemical affects the body’s ability to make melanin. More melanin gives a dog darker skin and less melanin makes the skin lighter. It’s melanin that gives many dogs a dark black nose and lips.
A dog that is allergic to plastic and comes into direct contact with this chemical may lose some color in their nose and/or lips. These dogs often get pink, discolored patches on their nose or mouth.
This condition is called plastic-dish dermatitis because it is caused by plastic dishes specifically.
The simplest way to treat doggy dermatitis at the first sign of it is to remove the source of the trouble: plastic bowls.
If your dog has any lumps, rashes, discolored areas, or blisters on its face or neck, replace your dog’s plastic dishes with ceramic bowls immediately (some dogs are also allergic to the nickel in steel bowls, so avoid these if your dog is showing signs of having allergies).
If the skin condition does not clear up on its own, you’ll need to see your veterinarian as your dog might be allergic to something else or have another skin condition, such as canine acne or vitiligo.
A dog might swallow pieces of plastic
Some dogs simply love to chew more than others, especially dogs that are younger than 7 months when their adult teeth are coming out, or if they suffer from pica and plastic is their food of choice.
These keen chewers might see their plastic bowl as another plastic dog toy and something to sink their teeth into.
If left unsupervised, a dog may chew off pieces from a plastic bowl – and swallow them.
If the dog swallows enough plastic or a large-enough piece of plastic, the plastic may get stuck in the dog’s digestive tract or cause internal damage and bleeding.
If you have a young teething puppy or a dog that loves to chew on hard plastic toys and destroy them, don’t give your dog a plastic bowl. Choose safer dog bowls that are harder to chew, such as stainless steel or ceramic bowls.
Old plastic bowls can grow bacteria and cause infections
Over time, plastic dog bowls get scratches on their surface. These scratches might be from your dog chewing or scratching the bowl, you dropping the bowl, or tiny scratches from cleaning that you can’t even see.
Mold and bacteria, such as E. coli and salmonella, can find their way into these scratches and grow there, even if you wash and clean the bowl regularly.
If there is mold and bacteria in your dog’s bowl, your dog could get quite ill.
And if the plastic bowl is damaged or rough from wear and tear, it could cause canine acne. This is because the rough surface breaks off fine hairs on the dog’s muzzle and chin when the dog uses the bowl.
Each hair is kept in the skin by a follicle, which is a small sac that sits under the skin’s surface. When a hair breaks off from being rubbed against a rough surface, like a plastic bowl, its follicle can burst and irritate the skin around it. The irritated skin can react with red bumps or pimples.
These red bumps or pimples in dogs are called ‘canine acne’.
You can manage these risks by replacing your dog’s plastic bowls regularly and checking your dog’s face and chin for any signs of acne.
If your dog has been using the same plastic bowl for a while, the bowl has any rough surfaces or broken edges, or you can see cracks or scratches, it’s time to get a new dog bowl.
It’s also good to keep your plastic bowl very clean, and here’s exactly how to do that…
3 steps to clean a plastic dog bowl
Here are 3 simple steps on how to clean plastic dog bowls properly:
Wash plastic bowls in hot, soapy water
Wash all of your dog’s plastic bowls with hot, soapy water every day. This includes the food and water bowls.
You can wash the bowls in a bucket, the kitchen sink, or in the dishwasher if the bowl is dishwasher safe (high-quality plastic bowls generally are dishwasher safe these days).
I recommend keeping a separate soft sponge for washing the dog’s bowls, and not using your household kitchen sponge for the job. This will stop you from spreading any germs and bacteria from the dog’s bowls to your family’s dishes.
If you’re handwashing, give the bowls a few minutes to soak in very hot water so the soap can do its job. Then give the bowls a good scrub down with a soft sponge – don’t use a scourer or anything that might scratch the surface.
Rinse the bowls with clean water until there is no soap residue left.
Disinfect the bowl
Washing in hot water removes dirt on the surface of the bowls, such as natural oils from your fingers and saliva or food particles from your dog’s mouth.
Once a week, disinfect the plastic bowls to kill bacteria and mold.
Most or all mold and bacteria in a plastic dog bowl can be killed or stopped by:
Wiping the bowl with a non-toxic disinfectant wipe or spray. It is important to use non-toxic cleaning products that won’t poison your dog.
Running a clothes steamer over the bowl
Putting water in the bowl and cooking it on high for a minute in the microwave
Shining a UV light on the bowl
Leaving the bowl out in the sun
Freezing the dog bowl overnight
Here are the dog-friendly disinfecting products I recommend (Amazon affiliate links below)
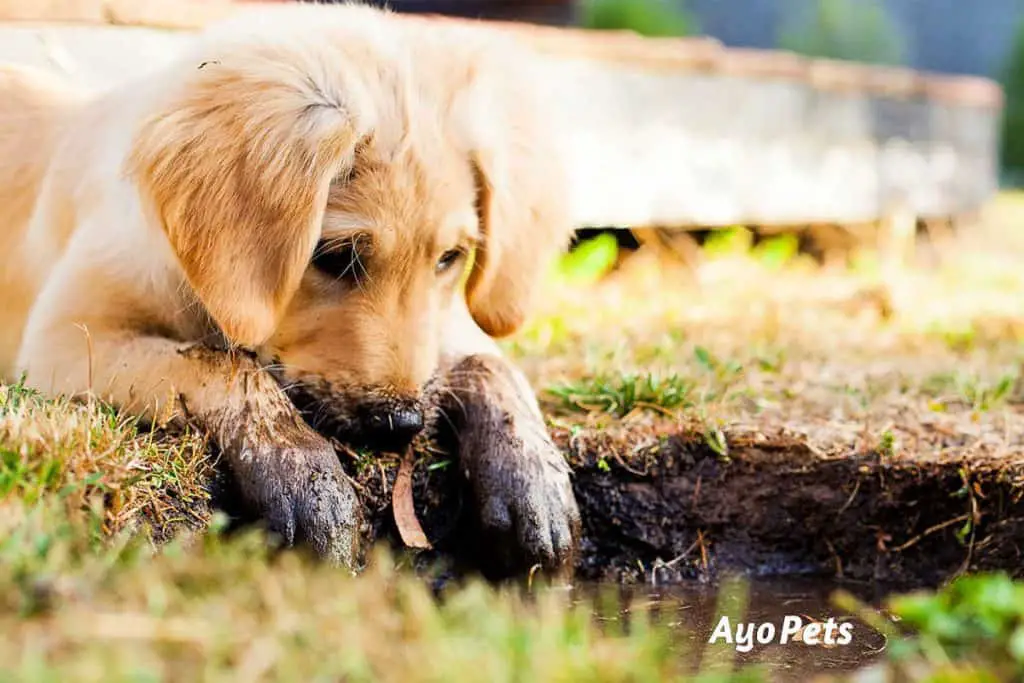
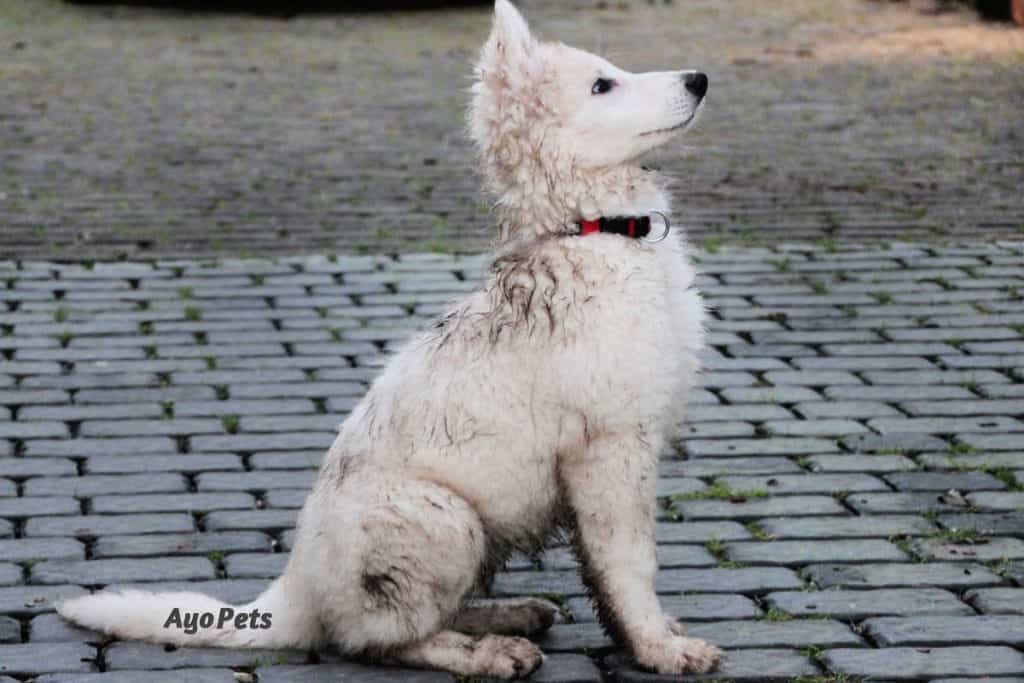
Puppies love to play and run around, but all that fun makes it likely your puppy will get covered in mud or step in poop fairly often. You might be wondering if you should bathe your puppy and how often. Well…
Puppies can be bathed once a month with puppy shampoo until they are 6 months old. After this, bathe your puppy every 6 months or when needed. Puppies with skin allergies or conditions can be bathed once a month with medicated shampoo, but no puppy should be bathed more than once a week unless recommended by a veterinarian.
Hygiene and cleanliness are important, but did you know that washing your puppy too often or too young can make your puppy sick, or damage the puppy’s fur and strip the skin’s natural oils?
The first question we need to ask ourselves is how often puppies really need baths to stay clean and healthy…
Recommended products in this post (affiliate links)
Healthy puppies don’t need set baths or a fixed bathing schedule, and it’s best to bathe them only when necessary or when taking them in for their first haircut.
Many veterinarians recommend washing a puppy that is between 3 and 6 months old no more than once a month with puppy shampoo.
A puppy’s adult fur grows out when the puppy is between 6 months and 1.5 years old. This fur helps to protect the dog’s skin, where there are oils that keep the skin healthy and clean.
Once your puppy is 6 months old, you can go as long as 6 months or more between washes without any problems.
Smells bad from rolling in something smelly. If your puppy’s skin smells strange it may be caused by a skin condition that needs medicated shampoo or a change in diet to heal – visit your veterinarian for advice on how to fix the cause rather than trying to hide the symptoms with puppy shampoo
Has fleas, ticks, and/or cannot take oral parasite treatments
Is being groomed and/or getting trimmed
A healthy puppy does not need to be bathed for the sake of bathing because:
1. Its skin has oils in it to keep the puppy clean and
2. A puppy can groom itself
Here’s how puppies stay clean without taking baths…
A puppy’s skin oils help keep it clean
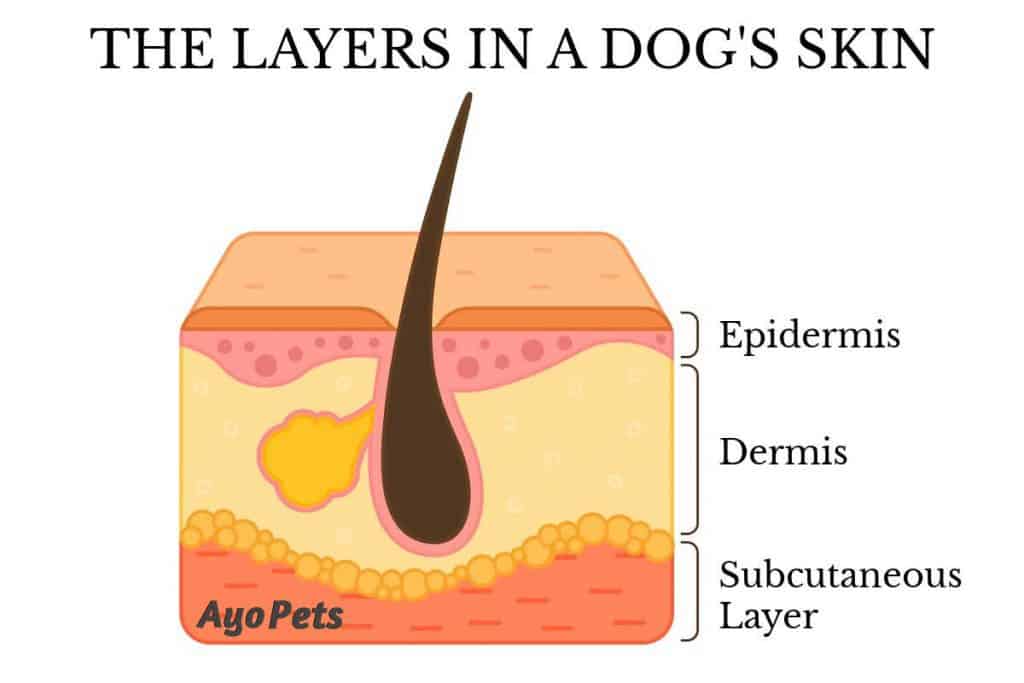
A puppy’s skin has 3 layers:
The epidermis, which is the outer layer that you can see with hair on it
The dermis sits under the epidermis. This is where the self-cleaning process begins with oil glands called sebaceous glands (see below)
The subcutaneous layer, which is where the puppy’s fat and muscle tissues are found
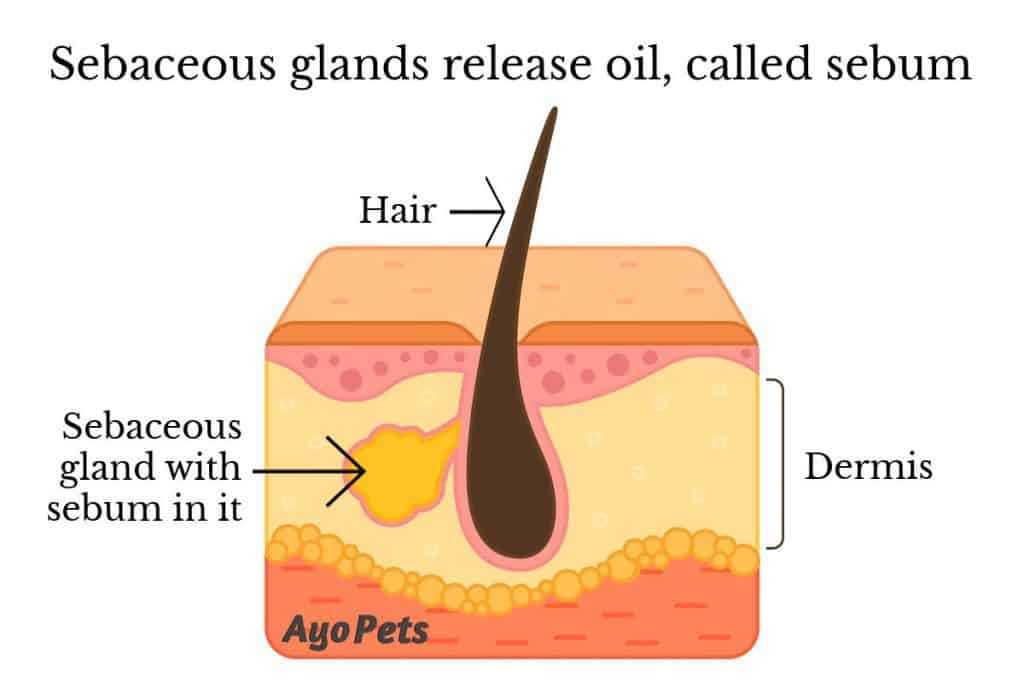
Do you see the sebaceous gland in the dermis layer? Sebaceous glands are attached to hair follicles in the dermis.
These sebaceous glands in the puppy’s skin release an oil called ‘sebum’. According to research, sebum keeps the skin moist and healthy, protects it from the environment, kills bacteria, and keeps it clean.
But how does oil actually help to keep a puppy’s skin and fur clean?
When a puppy is healthy and the skin is coated with sebum, the sebum stops dirt particles from sitting on the puppy’s skin. Sebum acts as a dirt repellent.
Sebum also lubricates the puppy’s hair. As the oil moves from the skin to the end of each hair, it takes dirt with it.
If you want to activate this natural, healthy way to clean your puppy without a bath, simply give your puppy a brush (click here to find out how often to brush your puppy) . Brushing will help to move sebum across your puppy’s skin and through the coat, removing dirt and making the skin and hair soft and shiny.
But sometimes puppy owners do things that can strip or remove all of this natural sebum from a puppy’s skin, which may give the puppy skin problems, brittle hair, and other health issues.
We often wash our puppy more often when a puppy gets these conditions, thinking we are sorting out the issue. But washing more often just makes the skin problem worse or the hair even more brittle because we are washing away the puppy’s sebum.
Soon we find ourselves in a vicious cycle of causing the problem with over-washing and making it worse with over-washing, when the puppy can sort this out naturally without any harsh cleaners, medications, and chemicals.
To maintain healthy sebum levels in your puppy, make sure you:
Use lukewarm water when you wash your puppy. Hot water isn’t good for a puppy’s skin
Don’t wash your puppy too often – puppies can be bathed once a month until they are 6 months old. After this, bathe your puppy every 6 months or when needed.
Brush your puppy regularly, about once a week, to move sebum along the skin and through the fur coat
How puppies clean themselves
Puppies don’t take daily baths with soap and water in nature while they run around in packs, so they have developed their own ways to groom their skin and coat.
A puppy will develop its own cleaning routine, which it will probably keep throughout the rest of its life. Some puppies love to groom themselves at certain times or after certain activities, such as eating, while other puppies only groom when they have to.
You will get to know your puppy’s grooming routine over time and what’s normal for that dog. If there is a sudden change in grooming, such as excessive licking or nibbling, then check the dog for scabs, ticks, or other problems.
Here are some of the ways that puppies might groom themselves:
Nibbling their skin
Puppies may ‘nibble’ their skin. They do this by gripping a small piece of skin between their front teeth and gently biting the skin and releasing it as they move their mouth in a line or around an area.
Puppies might nibble because they are itching in that spot, but this is also a way that dogs remove things stuck in their fur.
Nibbling also helps with dry skin. This nibbling action stimulates the sebaceous glands to release more sebum, the oil that moisturizes the animal’s skin. When there isn’t enough oil being released, puppies can often get dandruff. Click here to find out more about puppy dandruff.
The nibbling action is also like a brush moving through the puppy’s fur – it moves sebum along the skin and through the hair to remove dirt.
Licking themselves
Puppies may spend time licking their fur, skin, legs and paws as a way to wash themselves clean.
Rubbing their face
A puppy with a dirty face will often rub its face along the ground and scratch its face with its paws, to remove food and dirt.
Rolling around
To remove dirt, fur, and dust from their coats, puppies may roll around on the ground.
They may roll while lying on their sides and kick their legs, or they could lie on their back and swing their butts from side to side to get a good back rub.
Shaking themselves off
Puppies may shake themselves to loosen and remove dirt in their fur and on their skin.
They also do this when they’re wet, to dry themselves off quicker.
At what age can a puppy take its first bath?
A puppy can take its first bath when it is between 8 and 12 weeks old. If a puppy gets dirty before 8 weeks old, simply wipe off the dirt with a warm, wet sponge or cloth and dry the area immediately.
Puppies have lower body temperatures than adult dogs. From birth to about seven weeks of age, a puppy’s body naturally starts warming up from 97°F to around 101°F.
A few degrees does not sound like much of a difference, but it is big in a little puppy’s life!
Puppies are colder than adult dogs. They can’t keep their body temperature as stable as adult dogs or make themselves warmer like adult dogs.
So, a puppy is much more likely to get very cold after getting wet by a bath.
If the puppy gets too cold, it could get hypothermia. If left untreated, the puppy could die from this.
What makes a puppy need baths more often?
Some puppies need to be bathed more often than others simply because they:
Spend a lot of time outdoors and love playing in the dirt
Have long hair that traps dirt and gets matted
Have curly hair that needs to be groomed and trimmed regularly
Have a soft coat that holds dust and dirt
Sleep in your bed – and you want to give them baths once a month for hygiene reasons
Have skin conditions that require washes with a medicated shampoo – skin conditions are the main cause of bad smell in puppies and should be fixed through diet and medication rather than trying to wash away the smell
Are hairless – hairless puppy breeds need regular sponge baths to remove dirt and dead skin cells as they don’t have sebum and fur to help them stay clean
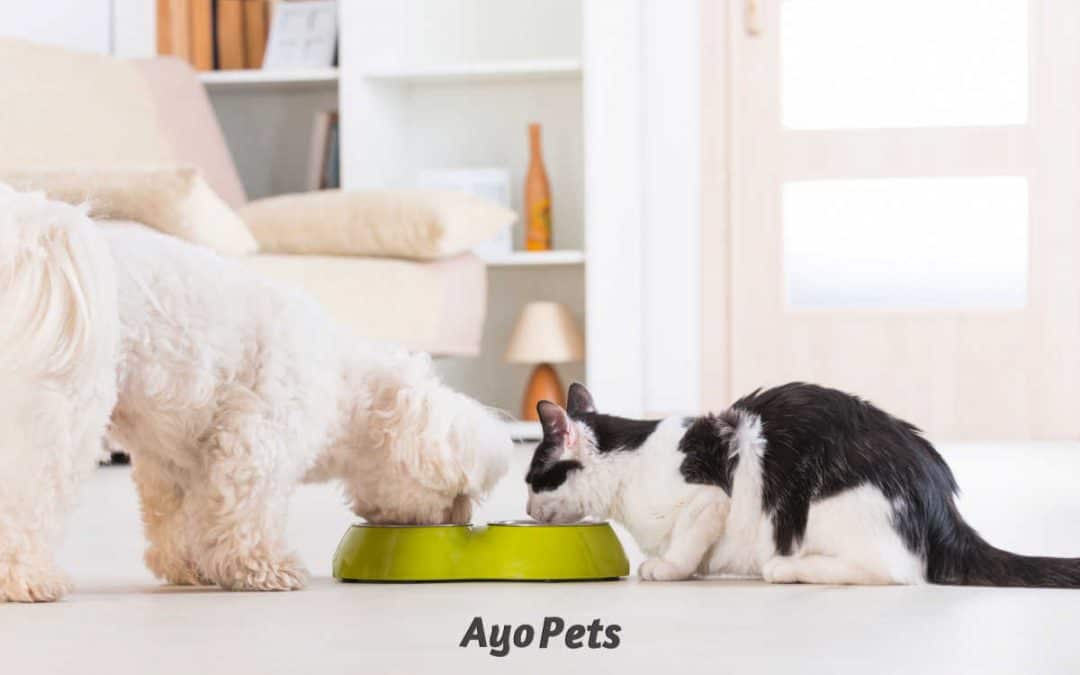
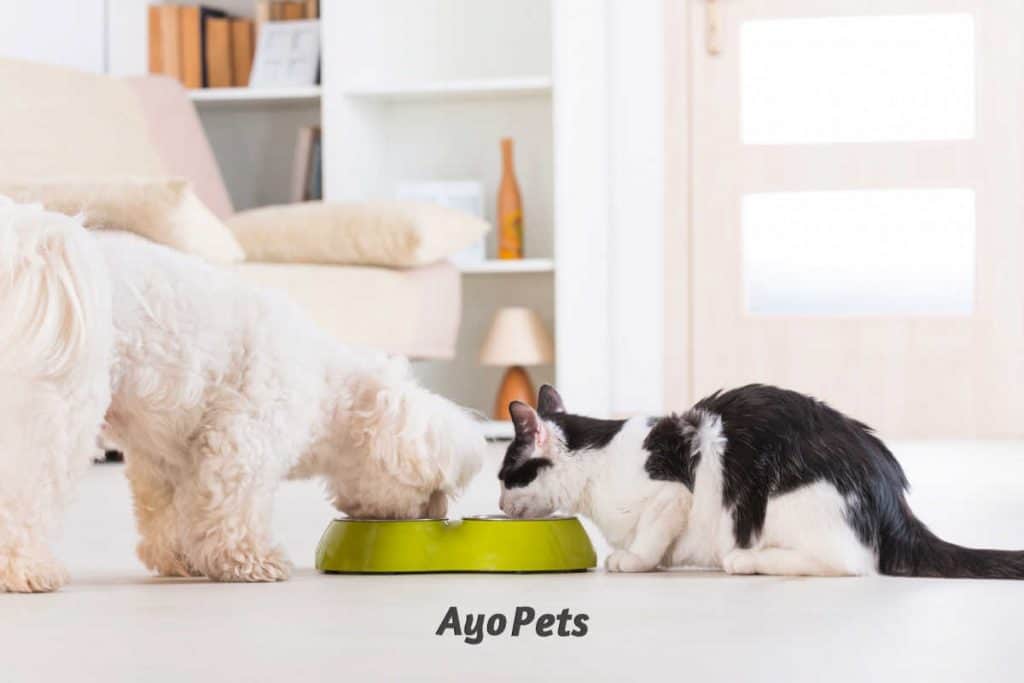
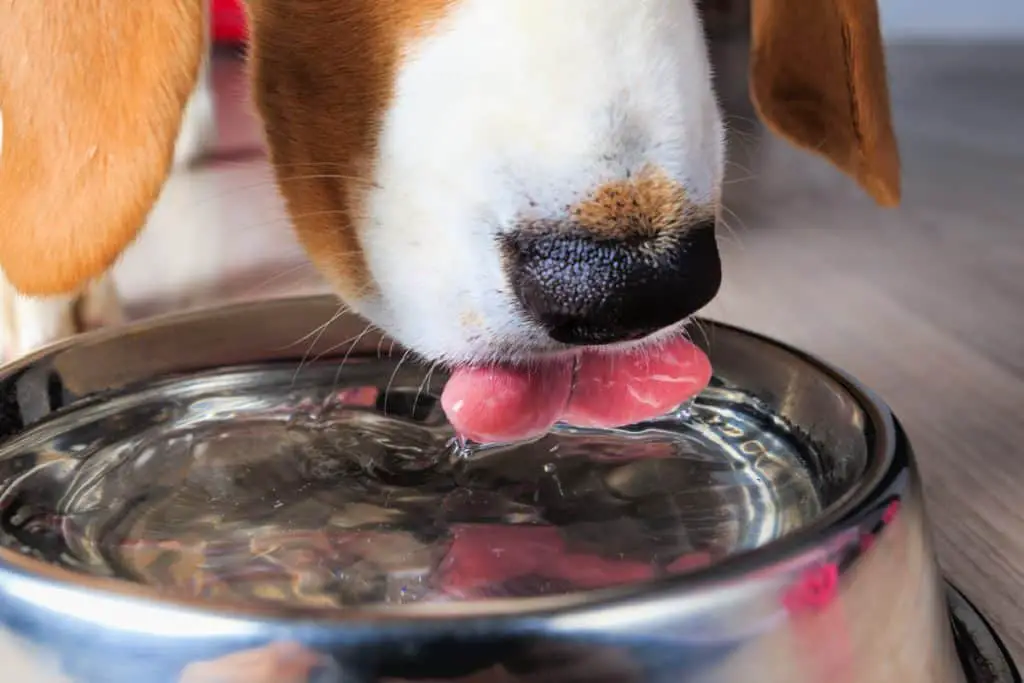
If you’ve got a dog and a cat, you might be wondering if they need separate water bowls or if they can share the same bowl.
A dog and cat can share a water bowl if they are happy to do so. Pets that are territorial or aggressive might not like sharing their water bowl with other animals, and they should not be forced to. If a dog and cat are introduced at a young age and are friends or they simply drink water out of each other’s bowls, there’s no reason to stop them.
With two cats and two dogs under my roof, I can tell you that my animals have been sharing a water bowl for many years and nothing bad has ever happened because of it. They are all friends and share their water, but I’m lucky they don’t share each other’s food too.
But what if one animal gets sick? Can they pass this on to the other animal through the water bowl?
Can dogs and cats catch anything from sharing a water bowl?
Cats and dogs that live together probably won’t catch anything from each other by sharing a water bowl. Most diseases affect only one type of animal, so they aren’t usually spread from one species to another.
It is possible but quite rare for a cat or dog to make the other one sick, but it probably won’t be through the water bowl because most animal diseases are not spread through the mouth.
If one of your pets has something that can be passed between species, this will more likely be passed in other ways, such as your dog getting worms from eating the cat’s poop, or one animal with ‘kennel cough’ coughing and sneezing on the healthy animal.
Sharing a water bowl does not increase the risk of spreading disease between a cat and dog.
If your dog and your cat have healthy immune systems, the risk of catching something from the water bowl is almost zero. If one animal does get sick, you can give each animal a separate water bowl until the sick animal makes a full recovery as an extra precaution.
Do dogs or cats drink more water?
Dogs tend to need a little more water than cats based on their body weight. A dog needs to take in 1 ounce of water per day for every pound of dog weight. A cat needs 0.7 – 0.9 ounces of water per day for each pound of cat weight.
The following table gives you a guide on how much water your dog should be consuming each day.
Find your dog’s weight range in pounds or kilograms, then check to see how much liquid your dog needs every day for that weight range:
The following table gives you a guide on how much water your cat should be consuming each day, based on the upper limit of 0.9 ounces of water per pound of cat weight.
Find your cat’s weight range in pounds or kilograms, then check to see how much liquid your cat needs every day for that weight range:
*The above tables are just guidelines – if you are unsure about how much water to give your pets or you have any questions, please ask your veterinarian for professional advice.
There are many factors that affect how much water a dog or cat will drink to be healthy, such as their weight, size, age, activity level, and whether your pet eats dry or wet food.
For example, wet food has more moisture in it. If this is part of your pet’s diet, they will naturally drink less water from their water bowl as they are getting some liquid from their food every day.
How much water to put out for a dog and cat sharing a water bowl
If a dog and cat are sharing a water bowl, work out how much water your dog needs per day and how much water your cat needs per day. Add these numbers together, then increase the total by 10 to 20 ounces. This is how much water to give your dog and cat each day.
It’s always better to put out far too much water than too little, as too little water can lead to dehydration and health issues, such as urinary and kidney problems.
Steps to determine how much water your dog and cat need per day:
STEP 1: Determine how much water your dog needs per day
Find your dog’s weight range in the table below and write down how much water your dog needs per day. These recommended amounts are on the top end of the required amount of drinking water because we always want to give too much water rather than too little.
For example, say I have a Schnoodle that weighs 10 lbs. Based on the table below, my Schnoodle needs 10 oz of water per day. So I write down 10 oz.
Dog’s weight range in lb
How much water your dog should consume per day in oz
Dog’s weight range in kg
How much water your dog should consume per day in ml
STEP 2: Determine how much water your cat needs per day
Find your cat’s weight range below and write down how much water your cat should consume each day. Again, these amounts are on the top end of the amount of water needed for this weight range.
Carrying on with my example, my cat is a male Maine Coon that tips the scales at 15 lbs. I find the correct weight range in the table below and see that he needs 18 oz of water per day. So I write down 18 oz.
Cat’s weight range in lb
How much water your cat should consume per day in oz
Cat’s weight range in kg
How much water your cat should consume per day in ml
Take your dog’s drinking water total and add it to your cat’s drinking water total. This is the minimum amount of water you need to give your cat and dog each day. But to be safe move on to step 4…
Now I add together the two numbers I’ve written down: 10 + 18 = 28 oz.
STEP 4: Bump up the total daily water requirement
Now add at least 10 – 20 ounces (600 ml – 1 l) to this total to bump it up a bit.
To bump up this number and make sure I’m giving my dog and cat more than enough water to drink, I add another 10 ounces because it’s winter here and still cold weather: 28 + 10 = 30 oz. Now I know I need to give my dog and cat 30 oz of fresh drinking water each day.
The total you get is how much water you should give your dog and cat to drink each day. You can provide your pets with more than one shared water bowl, especially if they are big breeds and need quite a bit of water to drink that won’t fit in the average water bowl.
You’ll soon see if the water you are giving your pets is enough. If there’s a lot of water left at the end of the day then you can give them a little less. If there’s no water left at the end of the day, you need to give them much more water.
If the water bowl is outside, it’s a warm season, or your pet is very active, give even more water each day.
A shared water bowl is a popular spot for your pets, so it’s good to put some thought into where you keep this bowl.
Put a shared water bowl out of the way of foot traffic in your home. Mudrooms, laundry rooms, and side areas in kitchens are all popular places to keep a water bowl. Dogs and cats prefer to drink without being disturbed, so the quieter the space the better. Most pet owners keep the water bowl close to food bowls.
You will also want to make sure that the water bowl is not in an area where a family member could unknowingly close a door and/or block the pets’ access to water somehow.
To encourage your pets to drink more water, put a water bowl near an area they spend a lot of time in, such as close to their beds.
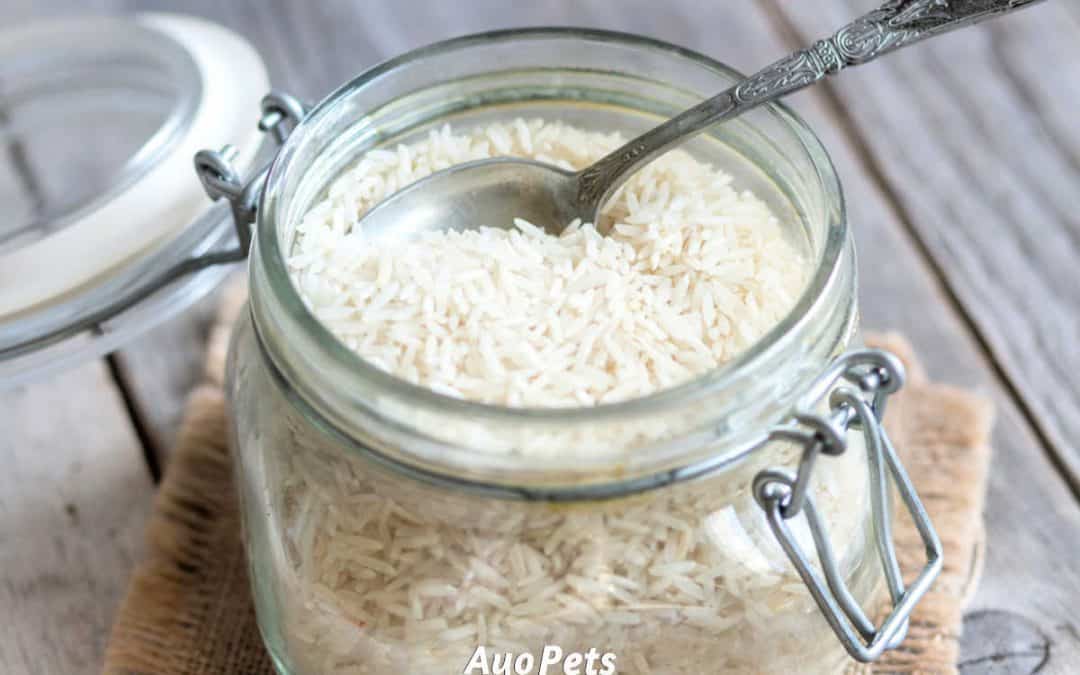
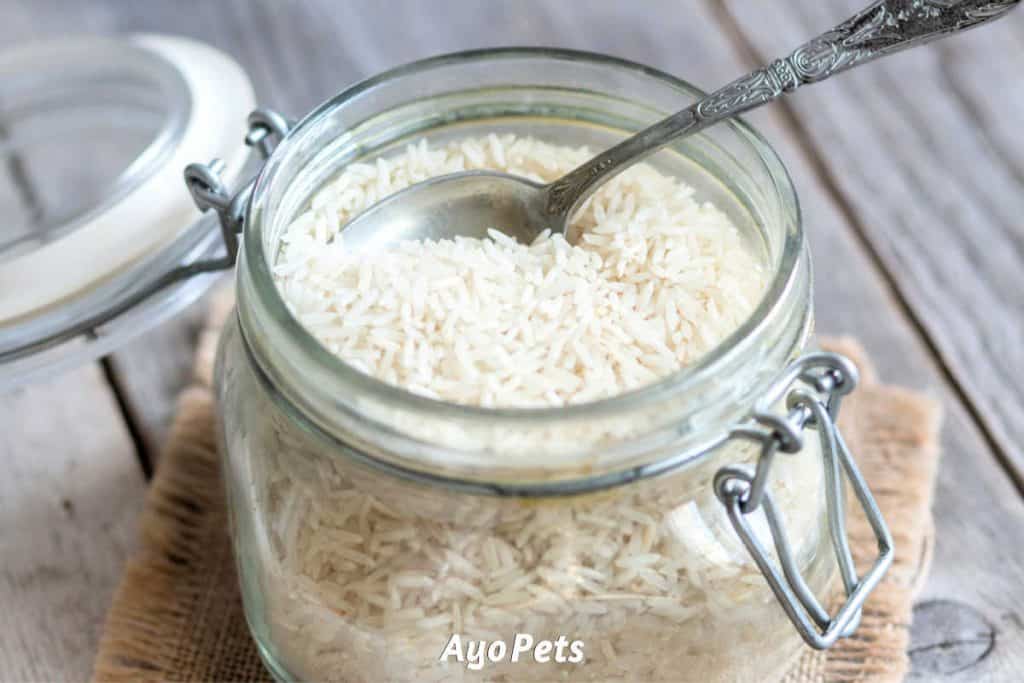
White rice is one of the best things to feed a dog with an diarrhea and it’s one of the best things to add to homemade dog food, along with other ingredients to make up a balanced diet.
To make rice for dogs, heat 2 cups of water in a large saucepan. Once boiling, add 1 cup of plain white rice to the water and put the lid on. Wait for the water to start boiling again, then turn down the heat to simmer. Leave the rice to cook, with the lid on, for 15 to 18 minutes. Don’t add any salt or seasonings.
Making rice for your dog is very easy, but you might be wondering how much rice to make, how much rice you should feed your dog each day, and how long you should keep your dog on rice.
Changing your dog’s diet quickly can cause many tummy problems, so it’s important to feed the right rice, in the right amount, and for the right length of time.
I did some digging to get all the answers and this is what I found out…
Step-by-step instructions on how to make rice for dogs
1. Check how much rice to feed your dog per day
The more your dog weighs or the bigger the breed, the more rice your dog will need to eat each day.
Find your dog’s weight in pounds or kilos in the following table, then check the last column to see how much rice to feed your dog per day. Remember to ask your veterinarian for advice if you’re unsure about anything.
Dog’s Weight In Lbs
Dog’s Weight In Kg
How Much Rice To Feed Your Dog Per Day In Total (Not Per Meal)
1 – 10 lbs
0 – 4.5 kg
Half a cup
11 – 20 lbs
4.6 – 9 kg
One cup
21 – 30 lbs
9.1 – 13.5 kg
One and a half cups
31 – 40 lbs
13.6 – 18 kg
Two cups
41 – 50 lbs
18.1 – 22.5 kg
Two and a half cups
51 – 60 lbs
22.6 – 27 kg
Three cups
61 – 70 lbs
27.1 – 32 kg
Three and a half cups
71+ lbs
33+ kg
Four cups
For example, if you have a schnauzer that weighs 15 lbs, you should feed your dog 1 cup of rice per day in total, for all meals in that day. If you have a large bullmastiff that weighs 100 lbs, you’ll need to feed your dog 4 cups of rice per day.
2. Decide how much rice to make
Now that you know how much rice your dog needs to eat per day, you can decide how much rice you want to cook for your dog.
When uncooked rice is boiled in water it triples in size, so you’ll need to use a pot that’s big enough to hold at least three times the amount of rice you’re cooking.
Find the number of cooked cups of rice you want to make in the first column below. Then check the second and third columns to see how much uncooked rice and how much water to use for your rice recipe.
How Many Cups Of Cooked Rice You’ll End Up With
How Many Cups Of Uncooked White Rice
How Many Cups Of Water To Use When Cooking The Rice
Say you want to cook enough rice to feed your schnauzer for the next 3 days. You know from step 1 that your schnauzer needs to eat 1 cup of rice a day, so you’ll be cooking 3 cups of rice to last 3 days (1+1+1). This means that you need to use 1 cup of uncooked rice and 2 cups of water to get 3 cups of cooked rice.
If you’re cooking for your very large dog, such as the bullmastiff we spoke about above, then you need 4 cups of rice per day. That means you’ll need to make 12 cups of rice if you want enough rice to last 3 days. In the first column we find 12 cups of cooked rice at the bottom of the first column. Next to that we can see that you should use 4 cups of rice and 8 cups of water in this rice recipe for dogs.
3. Bring the water to the boil
Put the water in a pot that’s big enough to hold the rice once it has tripled in size, with enough room to allow the water inside to boil while the rice cooks.
Put a lid on the pot and make sure that it seals well. Now turn on the heat and bring the water to the boil.
4. Add the rice to the boiling water
If you bought the rice from a bulk bin, put it in a fine mesh strainer and rinse it well under running water. This washes dust and dirt away from the rice.
Once the water is boiling in the pot, add the plain white uncooked rice that you want to cook.
Don’t ever add any salt, herbs, oils, butter, spices, or seasonings when you’re making rice for your dog. Just use plain white rice and water.
5. Bring the water back to the boil
Now that you’ve added the room-temperature rice, the water in the pot will cool down and stop boiling. Put the lid back on the pot and make the stove’s temperature medium-high, to bring the water back to boiling point.
You’ll know the water is boiling when big bubbles are popping on top of the water.
6. Simmer for 15-18 minutes
Once the water starts boiling again, turn down the heat to bring it to a simmer. You’ll know it’s simmering when the bubbles are smaller than the boiling bubbles and there’s a constant stream of these little bubbles popping on top of the water. There shouldn’t be any quiet time without bubbles on top of the water.
Leave the lid on the pot and let it simmer like this for 15-18 minutes. Try not to take the lid off at all – if you do, you’ll let the hot air out and cool down the water.
The cooking time will vary depending on your type of pot, your stove, and the rice you use. If you’re unsure about how long to simmer your rice, rather cook the rice for 18 minutes and see how it turns out. Overcooked rice is easier on a dog’s tummy than undercooked rice.
If the rice is overcooked after cooking it for 18 minutes, make a note for next time to try cooking it for a minute less. Keep doing this and testing things out until you find the best cooking time for your rice.
For the best cooked white rice, leave the lid on and don’t remove it while the rice is simmering. If you don’t have a clear lid and you must take a look inside, take a sneak peek in the last minute or so of the cooking time, closing the lid as quickly as possible.
7. Let the rice steam in the pot
Once the rice has simmered for 15-18 minutes, remove the pot from the stove’s heat. Leave the lid on and let the rice steam inside this hot pot for 10 minutes.
This is when the rice absorbs any water left in the pot.
8. Rake the rice with a fork
Now you can take the pot’s lid off and rake through the cooked rice with a fork, to separate the grains and help make it fluffy.
9. Add boiled chicken to your dog’s rice
It’s a good idea to add boiled chicken to your dog’s rice. This will give your dog more nutrients to heal and regain strength, all while being very gentle on the tummy.
To make boiled chicken for your dog, cover skinless, boneless chicken breasts with water in a pot. Bring the water to a boil and cook the chicken for 10-12 minutes, until the chicken is cooked all the way through. Pour off the water and shred the cooked chicken with a fork.
The formula to feed rice and chicken to your dog is two parts rice and one part chicken.
Your dog’s size and weight will determine how much chicken your dog needs to eat with their rice every day. Look up your dog’s weight in the following table to find out how much shredded, boiled chicken your dog needs to eat per day in total (not per meal):
Dog’s Weight In Lbs
Dog’s Weight In Kg
Chicken Per Day In Total
1 – 10 lbs
0 – 4.5 kg
One-quarter cup
11 – 20 lbs
4.6 – 9 kg
Half a cup
21 – 30 lbs
9.1 – 13.5 kg
Three quarters of a cup
31 – 40 lbs
13.6 – 18 kg
One cup
41 – 50 lbs
18.1 – 22.5 kg
One and a quarter cups
51 – 60 lbs
22.6 – 27 kg
One and a half cups
61 – 70 lbs
27.1 – 32 kg
One and three-quarter cups
71+ lbs
33+ kg
Two cups
10. Start feeding your dog the rice
If your dog has an upset stomach, don’t give your dog any food for 12-24 hours. This gives the tummy time to settle. After this fasting period, you can start feeding rice and boiled chicken.
Don’t give your dog the full day’s portion of rice and chicken in one meal as it’s far too much for one sitting.
Mix the rice and chicken that your dog needs for the day, then divide it up and feed your dog several small meals throughout the day if your dog has tummy issues.
Feed this chicken and rice mixture to your dog until there is a normal stool for a day or two, or until there’s no bowel movement for a day. This means that your dog’s diarrhea is going away.
If your dog doesn’t have tummy issues and you’re just feeding rice and chicken for a change, then there’s no need for a fasting period. You can divide the day’s food in two and feed half the chicken and rice in the morning and the rest in the late afternoon or evening.
11. Store the rice in the refrigerator
Keep the rice in a sealed container in the refrigerator, where it will last for up to one week.
If your cooked rice starts drying out, add 2 tablespoons of warm water to it before feeding it to your dog, to add some moisture.
If you want to save time, cook more rice than you need and freeze it in smaller portions.
12. Slowly introduce your dog back to regular dog food
If your dog’s stool normalizes, start adding some kibble to the chicken and rice meals. Each day, check your dog’s stool and add a little more kibble, reducing the amount of chicken and rice as the amount of kibble goes up.
Do this over a few days until your dog is eating regular dog food again and having normal bowel movements.
If your dog’s tummy gets upset one day, then increase the rice and chicken and feed less kibble that day.
What to add to rice for a dog
There are many things you can add to boiled rice to give your dog a more balanced diet, such as:
Boiled chicken
Hamburger meat
Other dog-friendly proteins
Dog-friendly vegetables
Dog-friendly fruits
Dog-friendly fats and oils
It’s important to get the balance right, especially if you plant to feed rice and other ingredients to your dog for a long period of time. If your dog doesn’t get the right balance of proteins, fats and carbohydrates, your dog could become malnourished, get growth deformities, and become sick or be more prone to infections.
Don’t ever add salt, pepper, seasoning, spices, or flavors to the food you feed your dog.
White rice is a great food to feed a dog that isn’t feeling well, has an upset tummy, or is too fussy to eat. You can feed your dog white rice and boiled chicken as a meal, or mix some into the kibble.
In fact, two parts white rice mixed with one part boiled chicken is a very tasty meal for most dogs, even though it’s pretty bland to you and me!
Some white rice mixed into dog food often gets a dog’s appetite going again. But feeding white rice to a dog isn’t a long-term solution for an upset tummy or a fussy eater.
If your dog has tummy issues that last a long time or your dog refuses to eat for a few days, it’s time to visit your veterinarian for advice and a checkup.
Can you give your dog rice every day?
White rice doesn’t provide all the nutrients your dog needs to maintain good health. Dogs need a balance of fats, proteins and carbohydrates in their daily diet, and white rice doesn’t provide many of these things.
Some white rice mixed into your dog’s kibble every day isn’t bad for your dog, but it might cause your dog to pick up weight over time, if your dog is overeating.
If your dog is eating a good-quality dog food, then there’s no need to feed your dog rice every day.
How much rice to give your dog
The amount of rice your dog needs every day depends on your dog’s breed and healthy weight range. If your dog is overweight, you should use your dog’s ideal weight to calculate how much rice to give your dog.
The following table shows exactly how much rice to give your dog daily. Weigh your dog, then find your dog’s weight in the first or second column. The third column shows you how much rice to feed per day in total, for all the meals your dog eats that day.
Dog’s Weight In Lbs
Dog’s Weight In Kg
Rice Per Day
1 – 10 lbs
0 – 4.5 kg
Half a cup
11 – 20 lbs
4.6 – 9 kg
One cup
21 – 30 lbs
9.1 – 13.5 kg
One and a half cups
31 – 40 lbs
13.6 – 18 kg
Two cups
41 – 50 lbs
18.1 – 22.5 kg
Two and a half cups
51 – 60 lbs
22.6 – 27 kg
Three cups
61 – 70 lbs
27.1 – 32 kg
Three and a half cups
71+ lbs
33+ kg
Four cups
How much chicken and rice to give a dog by weight
When feeding your dog white rice and boiled chicken, you need to feed two parts rice to one part chicken. So, if you are feeding your dog one cup of chicken for the day, you’ll add half a cup of boiled chicken to the mix.
The following table shows you how much boiled chicken and white rice to feed your dog per day, based on your dog’s weight:
Dog’s weight in lbs
Dog’s weight in kg
Rice per day
Chicken per day
1 – 10 lbs
0 – 4.5 kg
Half a cup
One-quarter cup
11 – 20 lbs
4.6 – 9 kg
One cup
Half a cup
21 – 30 lbs
9.1 – 13.5 kg
One and a half cups
Three quarters of a cup
31 – 40 lbs
13.6 – 18 kg
Two cups
One cup
41 – 50 lbs
18.1 – 22.5 kg
Two and a half cups
One and a quarter cups
51 – 60 lbs
22.6 – 27 kg
Three cups
One and a half cups
61 – 70 lbs
27.1 – 32 kg
Three and a half cups
One and three-quarter cups
71+ lbs
33+ kg
Four cups
Two cups
How long to feed your dog chicken and rice
If your dog is on a diet of chicken and rice because of an upset tummy, you’ll need to keep an eye on your dog’s bowel movements to see how long to keep your dog on this diet.
Give your dog a break from all food for 12-24 hours, so the tummy can settle down. Then start feeding the rice and chicken mixture in small meals throughout the day.
Keep doing this until your dog has a normal bowel movement.
When this happens, you can start adding a little kibble to your dog’s meals of chicken and rice. Each day, add a little more kibble and a little less chicken and rice. If your dog’s stools remain normal, then keep doing this over the course of a week.
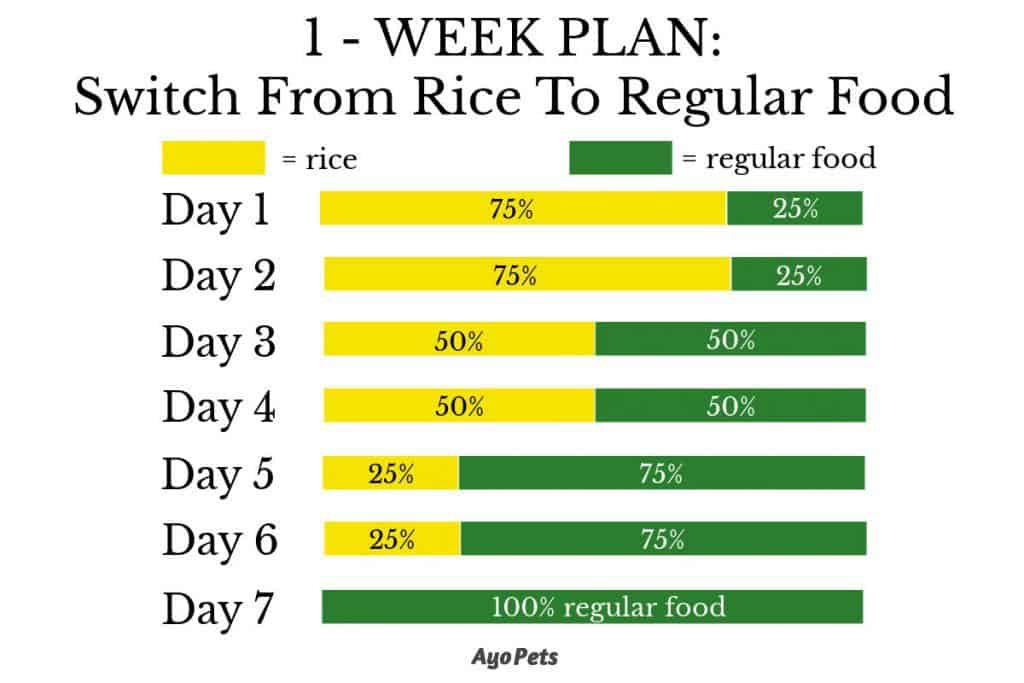
The following diagram gives you a one-week plan on how to move your dog over from rice back to regular dog food:
If your dog’s tummy is upset or constipated again, go back to feeding only chicken and rice. IF your dog is still having tummy troubles after a few days, get in touch with your veterinarian for advice as there may be a more serious issue or time to deworm your dog.
I'm Monique. I love animals and everything about them. "Ayo" means happy, and this is where I share all I know about having happy, healthy pets so you can have happy pets too.
Ayo Pets participates in the Amazon Services LLC Associates Program, the ShareASale affiliate program, and other affiliate programs. This means that if you buy a product or service through one of our links, we may receive a small commission from the sale for referring you. Thank you for your support!